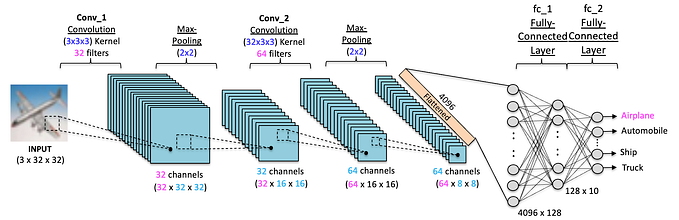
In this tutorial, I’ll show how to build a food image classifier, using transfer learning.. The goal is to take food images as input, and automatically identify what dish it is.. e.g. pizza, noodles, burger, sandwich etc …
Step 1: First, create a directory say ‘food-images’ or ‘food-samples’. In this directory, create a sub-folder for each class: {pizza, noodles, burger, soup, sandwich ..} etc. Each sub-folder should contain images (jpg, png, jpeg) for that class.
Step 2: Now, load this data into python. For this, we use function ‘image_dataset_from_directory’ from keras.utils.
train_data, valid_data = keras.utils.image_dataset_from_directory(
"food-images",
labels = "inferred",
class_names=('burger', 'cake', 'juice', 'noodles', 'pizza'),
image_size=(224,224),
batch_size=32,
validation_split=0.2,
subset="both",
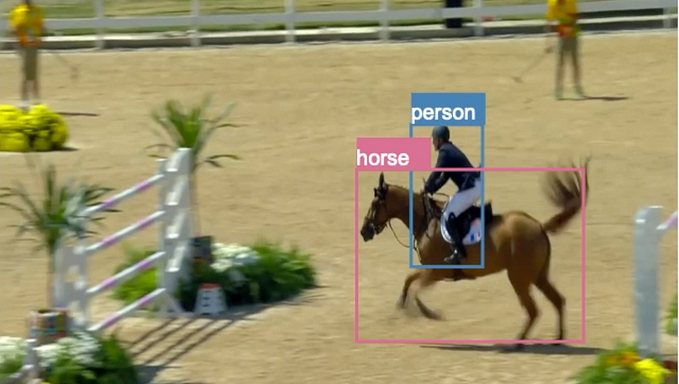
seed=1337)Step 3: Load pre-trained model weights. Note, these models are already trained on very large scale datasets, so even if our new image sample for food images is relatively very small (say few 100 to 1000 images per class), our classifier can still achieve decent accuracy. That’s the beauty of transfer learning, where we utilize model trained on large dataset (say to identify cats, dogs, horse, airplane, car, bus from image) and modify or customize it for a new task.
# load pre-trained model
from keras.applications.resnet50 import ResNet50
from keras.applications.resnet50 import preprocess_input

base_model = ResNet50(weights='imagenet', include_top=False)
base_model.trainable = False
Step 4: Now, we add some new layers on top of this base_model, and only train these new layers on our food image dataset.
# build new model on top of pre-trained model

from keras import layers

num_classes = 5

# add new layers to base_model
model = keras.Sequential([
  base_model,
  layers.GlobalAveragePooling2D(),
  layers.Dense(64, activation='relu'),
  layers.Dense(num_classes, activation='softmax')
])
Step 5: Now, we just compile our model as usual, and train it on new food image dataset. Note, in step 3, we set base_model.trainable as False, so our pre-trained model is not be altered during training. Only the new layers added on top are trained on custom dataset.
model.compile(optimizer='adam', loss='sparse_categorical_crossentropy')
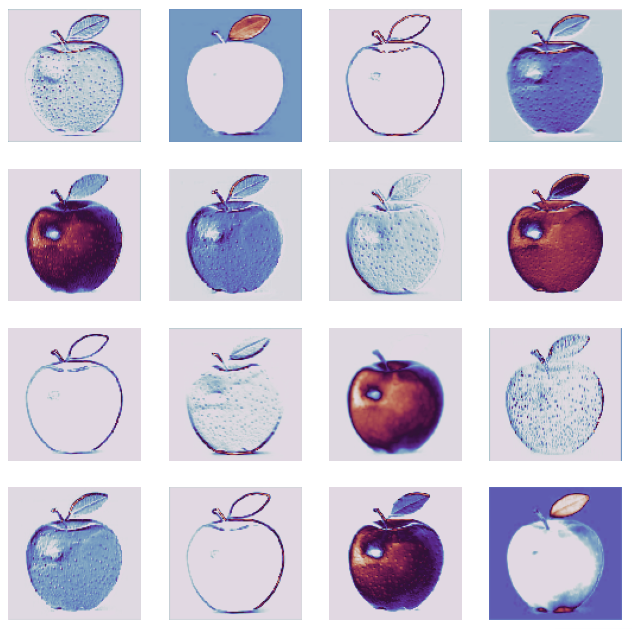
model.fit(train_data, validation_data=valid_data, epochs=3)Step 6: Let’s try our food-image classifier on few sample test images.
# load test images
test_sample = []

for k in range(25):
  img_file = str(k+1) + ".jpg"
  test_img = keras.utils.load_img(img_file, target_size=(224,224))
  test_sample.append(test_img)

np.array(test_sample).shape
# run model predictions
y = model.predict(np.array(test_sample))
# plot model output on test images
plt.figure(figsize=(8,8))
for k in range(25):
plt.subplot(5, 5, k+1)
plt.imshow(test_sample[k])
label = class_labels[np.argmax(y[k])]
plt.xlabel(label)
plt.xticks([])
plt.yticks([])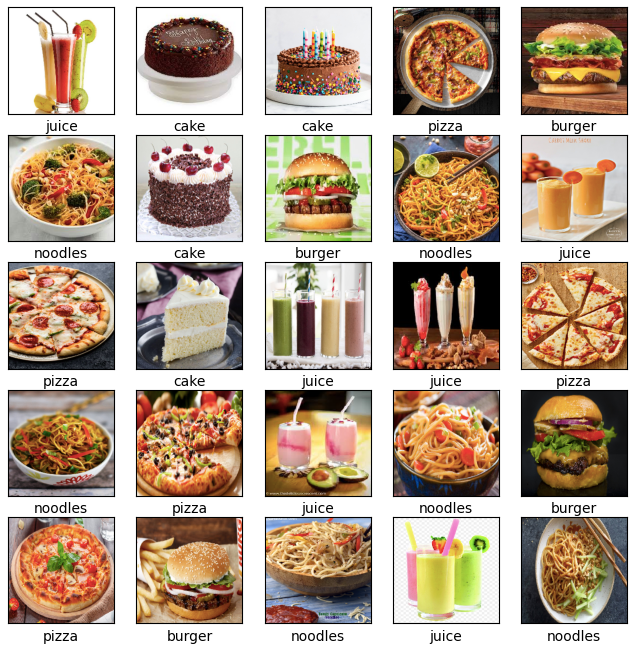
Yumm, isn’t it? For more yummy code examples, check out my git repo at : https://github.com/pamruta/Keras